Raspberry Pi Pico W IoT Project
Tips & Tricks I learned along the way for using Micropython with a Raspberry Pi Pico W (Pico). This is a 0 to 1 post for starting a project on the Pico. The particular use case is not as important (for me, this was controlling model train layouts), as this approach is valid for a wide range of IoT projects.
High Level Goal configure the Pico and connect it to a home network. After connecting, setup a variety of “devices” that utilize the GPIO pins and allow interactions with these devices through a web server (REST API). Develop scripts to build, install, and deploy our code locally and remotely.
In each section, I will include code snippets and links to my repo where appropriate.
Table of Contents
Development Setup
First, we need to prepare to write code. Unlike a typical code project, we need to first install a firmware to the Pico and work out a way to send and execute code to the board.
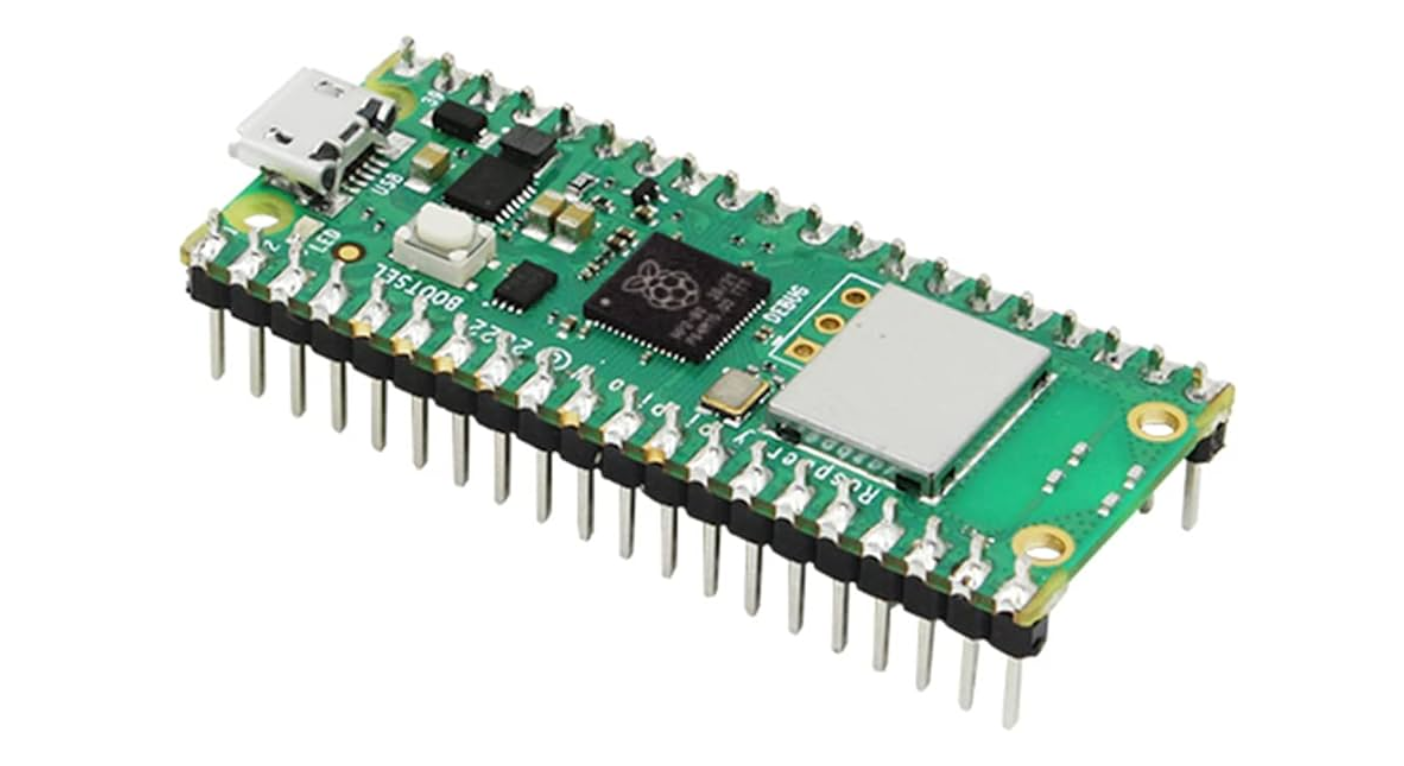
Connecting to the Pico
The Raspberry Pi Foundation’s tutorial is definitely the best place to learn how to connect to your Pico to the computer using its micro USB port. For our purposes, you should be familiar with:
- Connecting the micro USB into the Pico.
- Using the BOOTSEL button to mount the Pico as an external drive.
- Connecting the USB into your computer.
Installing A Firmware
Now we need to install the standard libraries and core functionalities onto the Pico. Open-source firmware exists that pre-packages this into one file with a .uf2 extension.
MicroPython This tutorial uses MicroPython. Head over to this download page and download the latest .uf2 file (time of writing has v1.22.2 as latest). For installation, we are going to follow their advice:
Hold down the BOOTSEL button while plugging the board into USB. The uf2 file below should then be copied to the USB mass storage device that appears. Once programming of the new firmware is complete the device will automatically reset and be ready for use.
File Structure: src vs. bin
As is common in code projects, src stands for source code and bin stands for binary. In MicroPython, you can create .mpy files which is precompiled code that can be used just like its .py equivalent. Ill cover more on how to build these .mpy files with the mpy-cross in the building section, but for now note that the directory will look like:
1
2
3
4
5
6
7
8
9
10
11
12
project
│   README.md
│   main.py
|   version.json
│
└───src
│   │   main.py
│   │   ...
│
└───bin
    │   main.mpy
    │   ...
[ Optional ] Code Editor (IDE)
I prefer VSCode but many other great editors exist. If you choose to go with VSCode, then Pico-W-Go is a nice extension to boost your developer productivity.
Code Authoring
Now on to the fun part, writing some code! For this part, we will author connecting to the home network, using GPIO, serving content, and more.
What is main.py?
Link to main.py in my repo.
main.py is a special filename on the Pico. Upon booting, if there is a main.py in root directory, then that script is automatically ran. For my main.py, I keep this as simple as possible:
1
2
3
4
from bin.main import run

if __name__ == "__main__":
    run()
With all the interesting details happening in run() as defined in bin/main.py which is built from src/main.py. If you are still developing your run(), no problem, just remove the file since its small and continue developing. My run() then looks like:
1
2
3
4
5
6
7
8
9
10
11
12
13
14
15
16
17
18
from .connect import connect
from .microdot_server import run as _run
from .server_methods import load_devices
from .logging import log_flush


def run() -> None:
    log_flush()
    # [1] Connect to wifi network
    connect()
    # [2] Setup pins
    load_devices()
    # [3] Start webserver
    _run()


if __name__ == "__main__":
    run()
Which I will cover in more detail in the next sections.
Connecting to the Network
Link to src/connect.py in my repo.
The Pico has two network types, Station and Access point. Station is able to connect to a home network and Access Point acts as a hotspot, allowing devices to connect to it’s network. In practice, we will want the Pico to first act as an Access Point, allowing the users to pass some network credentials, and then as a Station. Overall, this looks like:
1
2
3
4
5
6
7
8
9
10
11
12
13
14
15
16
17
18
19
20
21
22
def connect() -> None:
    """Connect to a WLAN network.

    First, attempt to connect as a station using provided credentials.
    If this fails, then default to an Access Point using default credentials.
    """
    # Set the global hostname to be a combination of "RailYard" and the
    # devices MAC address to ensure uniqueness.
    network.hostname(NetworkInfo(Connect.sta).hostname)  # type: ignore
    connect_as_station()

    if Connect.sta.status() != 3:
        Connect.sta.disconnect()
        Connect.sta.active(False)
        connect_as_access_point()
        Connect.nic = Connect.ap
        log_record("Connected to ap")
    else:
        Connect.ap.disconnect()
        Connect.ap.active(False)
        Connect.nic = Connect.sta
        log_record("Connected to sta")
If your project involves multiple Picos and you need to find each Pico on the network automatically, I recommend setting each Pico’s hostname to something unique. For example, taking:
Will assign each Pico a hostname involving the mac address which should be unique enough for most use cases.
Where we have the access point connection:
1
2
3
4
5
6
7
8
9
10
11
12
13
14
15
16
17
def connect_as_access_point() -> None:
    _AP_IP = const("192.168.4.1")
    _AP_SUBNET = const("255.255.255.0")
    _AP_GATEWAY = const("192.168.4.1")
    _AP_DNS = const("0.0.0.0")
    _AP_PASSWORD = const("getready2switchtrains")

    Connect.ap.config(
        ssid=NetworkInfo(Connect.ap).hostname,
        password=_AP_PASSWORD,
    )
    Connect.ap.active(True)
    time.sleep(0.1)
    # NOTE: These are the defaults for rp2 port of micropython.
    #   It doesn't seem possible to change these without side-effects.
    Connect.ap.ifconfig((_AP_IP, _AP_SUBNET, _AP_GATEWAY, _AP_DNS))
    time.sleep(0.1)
And station connection:
1
2
3
4
5
6
7
8
9
10
11
12
13
14
15
16
17
18
19
20
21
def connect_as_station() -> None:
    _MAX_WAIT: int = const(10)

    # Setup sta NIC attribute.
    Connect.sta.config(ssid=NetworkInfo(Connect.ap).hostname)
    Connect.sta.active(True)

    # Load the cached ssid/password.
    ssid_info = load_credentials()
    ssid = ssid_info.get(Credential.SSID, None)
    password = ssid_info.get(Credential.PASSWORD, None)

    if ssid is not None and password is not None:
        Connect.sta.connect(ssid, password)
        wait = _MAX_WAIT
        while wait > 0:
            log_record(f"Attempting connection to ssid: {ssid}")
            if Connect.sta.status() < 0 or Connect.sta.status() >= 3:
                break
            wait -= 1
            sleep(1)
Each function updates singletons Connect & NetworkInfo which keep the state of the connection and communicates the results to the clients (more on this in Serving Content). Connect for example looks like:
1
2
3
4
5
6
7
8
9
10
11
12
13
14
15
16
17
18
19
import os
import network
from network import WLAN
from micropython import const

class Connect:
    """Singleton for connect attributes/constants."""

    _VERSION: str = const("version.json")
    _CREDENTIAL_FOLDER = const("secrets")
    _CREDENTIAL_PATH = f"./{_CREDENTIAL_FOLDER}/secrets.json"
    if _CREDENTIAL_FOLDER not in os.listdir():
        os.mkdir(_CREDENTIAL_FOLDER)

    sta: WLAN = network.WLAN(network.STA_IF)
    ap: WLAN = network.WLAN(network.AP_IF)

    # NIC object that is found at runtime.
    nic: WLAN
Using the GPIO Pins
Link to src/train_switch.py in my repo.
To control the GPIO pins, I recommend picozero as a starting point. I copy+pasted this file into src/lib/picozero.py and used:
DigitalOutputDeviceAngularServoMotorServo
The logic here will be highly use case specific, so I will provide some general usage of picozero rather than focus on my exact implementation. For example, to use two DigitalOutputDevice’s:
1
2
3
4
5
6
7
8
9
10
11
12
13
14
15
16
17
18
19
20
21
22
23
yg_relay = DigitalOutputDevice(
    pin=_pins[0], active_high=active_high, initial_value=initial_value
)
br_relay = DigitalOutputDevice(
    pin=_pins[1], active_high=active_high, initial_value=initial_value
)

if action == RelayTrainSwitch.off_state:
    br_relay.off()
    br_relay.on()
    time.sleep(self._BLINK)
    br_relay.off()
elif action == RelayTrainSwitch.on_state:
    yg_relay.off()
    yg_relay.on()
    time.sleep(self._BLINK)
    yg_relay.off()
elif action is None:
    pass
else:
    raise ValueError(
        "Invalid command to train switch." + f"\n Found action: {action}"
    )
Similarly, to use a (SG90) micro servo:
1
2
3
4
5
6
7
8
9
10
11
12
13
14
15
16
17
18
19
20
servo = AngularServo(
    pin=pin,
    initial_angle=initial_angle,
    min_angle=min_angle,  # For me, this is const(0)
    max_angle=max_angle,  # For me, this is const(80)
    frame_width=1 / 50,  # 1/50Hz corresponds to 20/1000s default
    min_pulse_width=4 / 10000,  # corresponds to 2% duty cycle
    max_pulse_width=24 / 10000,  # corresponds to 12% duty cycle
)

if action == ServoTrainSwitch.off_state:
    angle = min_angle
elif action == ServoTrainSwitch.on_state:
    angle = max_angle
else:
    raise ValueError(
        "Invalid command to train switch." + f"\n Found action: {action}"
    )

servo.angle = angle
As you can see, picozero is what you’d expect as a high level, user friendly, Python API.
Serving Content
Link to src/microdot_server.py in my repo.
If you learn nothing else from this post:
Consider Microdot to serve HTML content or host a REST API with your Pico.
If your at all familiar with Python’s Flask, then you will feel right at home with Microdot. After copy+pasting this file into src/lib/microdot.py, you can do:
1
2
3
4
5
6
7
8
9
10
11
12
from micropython import const
from .lib.microdot import Microdot, Request, Response

class StatusMessage(object):
    _SUCCESS: str = const("success")
    _FAILURE: str = const("failure")

@app.get("/")
@log_exception
@led_flash
async def root(_: Request) -> str:
    return StatusMessage._SUCCESS
Where led_flash and log_exception are two async helper methods:
1
2
3
4
5
6
7
8
9
10
11
12
13
14
15
16
17
18
19
20
21
22
23
24
import io
import sys
from .lib.picozero import pico_led

def led_flash(func):
    async def wrapper(*args, **kwargs):
        pico_led.on()
        results = await func(*args, **kwargs)
        pico_led.off()
        return results

    return wrapper


def log_exception(func):
    async def new_func(*args, **kwargs):
        try:
            return await func(*args, **kwargs)
        except Exception as e:
            buffer = io.StringIO()
            sys.print_exception(e, buffer)
            log_record(buffer.getvalue())

    return new_func
You can read more about log_record in the next section, Logging. Another helpful debugging tip, is to log the request url and status code after serving a request:
1
2
3
@app.after_request
async def server_log_request(request: Request, response: Response):
    log_record(f"{request.url} - {response.status_code}")
For my use case, I was interested in hosting a REST API (returning json states rather than HTML code) and then populate a UI on the client in a mobile app. Broadly speaking, I have 5 categories of methods:
- Server API network utilities, restarting/stopping the server, updating the server
- Devices API toggle/reset/change devices
- Profiles API save/load/delete configurations of devices
- Credentials API save/reset credentials to access a network
- Log API debug logs
I like to handle the logic in a separate function, and keep the microdot as a thin layer that returns the response back to the client. For example, to scan the network:
1
2
3
4
5
6
7
from json import dumps

@app.get("/scan")
@log_exception
@led_flash
async def server_scan(_: Request) -> str:
    return dumps(scan())
Where scan is handled back in connect.py:
1
2
3
4
5
6
7
8
9
10
11
12
13
14
15
16
17
18
19
20
21
22
23
24
25
26
27
28
29
30
def scan() -> list[dict[str, str]]:
    return [ScanResult(*s).json for s in Connect.sta.scan()]

class ScanResult(object):
    def __init__(
        self,
        ssid: bytes,
        bssid: bytes,
        channel: int,
        RSSI: int,
        security: int,
        hidden: int,
    ):
        self.ssid: str = ssid.decode("utf-8")
        self.bssid: str = binascii.hexlify(bssid).decode("utf-8")
        self.channel = str(channel)
        self.RSSI = str(RSSI)
        self.security = str(security)
        self.hidden = str(hidden)

    @property
    def json(self) -> dict[str, str]:
        return {
            const("SSID"): self.ssid,
            const("BSSID"): self.bssid,
            const("CHANNEL"): self.channel,
            const("RSSI"): self.RSSI,
            const("SECURITY"): self.security,
            const("HIDDEN"): self.hidden,
        }
And then finally I can parse these results on the client, as I described in this post.
Microdot 2.X is quite different from 1.X as described here. I originally used the synchronous 1.X and recently converted to 2.X which required minimal refactoring but made my server asynchronous.
Microdot was a pleasure to use and it enabled me to quickly integrate my project’s logic into a server.
Logging
Link to src/logging.py in my repo.
Last, but not least, we want some way to store debug logs to help debug problems and record performance. For this, I used:
1
2
3
4
5
6
7
8
9
10
11
12
13
14
15
16
17
18
19
20
21
22
23
24
25
26
27
28
import os
import time
from micropython import const

class Logging:
    """Singleton for logging attributes/constants."""

    _LOG_FILE: str = const("log.txt")

def log_record(record: str) -> None:
    year, month, mday, hour, minute, second, _, _ = time.localtime()
    header = f"{year}:{month}:{mday}::{hour}:{minute}:{second}@ "
    _new_record = f"{header}{record}\n"

    if Logging._LOG_FILE not in os.listdir():
        log_new_record(_new_record)
    else:
        add_record(record=_new_record)

def log_new_record(record: str) -> None:
    with open(Logging._LOG_FILE, "w") as f:
        f.write(record)

def add_record(record: str) -> None:
    """Extend the log file by one record."""
    with open(Logging._LOG_FILE, "a") as f:
        f.write(record)
        f.flush()
I can then return the content of log.txt back to the user for further inspection.
Building
With your code written, we now have to compile and copy the code to the Pico.
I have only tested the following scripts on my Macbook Pro. I am sure Windows equivalents exist, but have little experience in those environments.
Building from src into bin
Link to scripts/build.sh in my repo.
Building requires the usage of mpy-cross which can be used as described here. I automated this process using a simple bash script:
1
2
3
4
5
6
7
8
9
10
11
12
13
14
15
16
17
18
19
20
21
#!/bin/bash
RED='\033[0;31m'
NC='\033[0m'
source .venv/bin/activate
files=$(find src | grep "\.py")
total="$(echo $files | wc -w | tr -d ' ')"
echo "----------------------------------"
echo "Building [$total] files..."
echo "----------------------------------"
for file in $files
do
    newfile=$(echo $file | sed "s+src/+bin/+" | sed "s+.py+.mpy+")
    build_result=$(python3 -m mpy_cross $file -o $newfile 2>&1)
    if [[ -n $build_result ]]
    then
        echo -e "🔨 ${RED}$newfile ❌"
        echo -e $build_result${NC}
    else
        echo 🔨 $newfile ✅
    fi
done
This will automatically build all of the src/*.py files into bin/*.mpy assuming mpy-cross has been installed in a venv under your root directory.
Copying files to the Pico
Link to scripts/copy.sh in my repo.
There are many ways to copy files to the Pico, I found Adafruit’s adafruit-ampy the easiest to incorporate into a script:
1
2
3
4
5
6
7
8
9
10
11
12
13
14
15
16
17
18
19
20
21
22
23
24
25
26
27
28
29
30
31
32
33
34
35
36
37
38
39
40
41
42
43
44
45
46
47
48
49
50
51
#!/bin/bash
RED='\033[0;31m'
NC='\033[0m'
BLUE='\033[0;34m'
BGreen='\033[1;32m'
ADAFRUIT=adafruit-ampy

# Check to see if adafruit-ampy is installed.
installed=$(pip3 freeze | grep $ADAFRUIT)
if [[ $(echo $installed | wc -w) -eq 0 ]]; then
    echo -e "${BLUE}$ADAFRUIT not installed, installing now${NC}"
    pip3 install $ADAFRUIT
fi

# Start the file copy to a serial connection.
export AMPY_PORT="$(ls /dev/tty.usbmodem*)"

echo -e "${BLUE}🗑️  Reset build files${NC}"
# Clear directories on the board
_=$(ampy rmdir / 2>&1)
# Make sure directories already exist.
_=$(ampy mkdir bin 2>&1)
_=$(ampy mkdir bin/lib 2>&1)

files=$(find bin | grep .mpy)
# Add the main.py to autoboot the API
files=$(echo $files "main.py")
total="$(echo $files | wc -w | tr -d ' ')"
echo -e "${BLUE}Copying [$total] files${NC}"
# Use ampy to upload files from the source directory to the Pico
i=0
j=0
for file in $files; do
copy_result=$(ampy put "$file" "$file" 2>&1)
if [[ -n $copy_result ]]; then
    echo -e "🔨 ${RED}$file ❌"
    echo -e $copy_result${NC}
    ((j=j+1))
else
    echo "🔨 $file ✅"
    ((i=i+1))
fi
done

echo -e "${BGreen}----------------------------------"
echo "Copy Report:"
echo "----------------------------------"
echo "[$i / $total] file copies ✅ "
echo "[$j / $total] file errors ❌"
echo -e "----------------------------------${NC}"
exit 0
For this to work, you need a unique serial connection so that ls /dev/tty.usbmodem* resolves to only your Pico. You can ensure this by only having the Pico connected as a usb peripheral device.
[ Optional ] Bulk Installation
Link to install.py in my repo.
The above two scripts is probably enough automation for most use cases. If you need to install your scripts to multiple Pico’s, then running:
1
python3 install.py firmware/RPI_PICO_W-20231005-v1.21.0.uf2
Will automatically update the firmware you pass and then run copy.sh to copy your custom files to the Pico. The script runs in a while True: ..., so you can quickly build multiple Pico’s without the hassle of clicking.
Deploying
With everything nicely packaged and installed to a couple Pico’s, there might be a time where you want to update your code across your servers (or… ahem… fix a bug).
Over-The-Air (OTA) Updates
Link to src/ota.py in my repo.
I initially got the OTA idea from @kevinmcaleer’s YouTube, in this repo. The idea works as follows:
- Build a public GitHub repo with your code.
- Add a
version.jsoncontaining 1) a commit/branch/tag and 2) a manifest of the files you with to OTA. - On the Pico, download the raw file content from the manifest and write that content to the appropriate file paths.
The key limitation of this approach is that you cannot update the firmware, only files in the repo. So, if you introduce a breaking code change that requires a new firmware dependency, this model may not be the best approach for you.
In my repo, version.json looks like:
1
2
3
4
5
6
7
8
9
10
11
12
13
14
15
16
17
18
{
    "tag": "v0.0.12",
    "files": [
        "main.py",
        "bin/lib/__init__.mpy",
        "bin/lib/microdot.mpy",
        "bin/lib/picozero.mpy",
        "bin/__init__.mpy",
        "bin/config.mpy",
        "bin/connect.mpy",
        "bin/logging.mpy",
        "bin/main.mpy",
        "bin/microdot_server.mpy",
        "bin/ota.mpy",
        "bin/server_methods.mpy",
        "bin/train_switch.mpy"
    ]
}
which is hosted under the root of the directory. Inside a config.py file, I read this file with:
1
2
3
4
5
6
7
8
9
class RailYardRemoteConfig(RemoteConfig):
    manifest = Connect._VERSION

    def __init__(self) -> None:
        super().__init__(
            remote_url=RepoURL(
                user="jakee417", repo="Pico-Train-Switching", version="main"
            )
        )
Which is then updated by passing the config to OTAUpdate in src/ota.py:
1
2
3
4
5
6
7
8
def ota():
    # Depending on where this code lives, it can break subsequent workflows.
    # If we have a bad config, silently fail so that our devices
    # out in the wild do not start failing mysteriously.
    try:
        OTAUpdate(config=RailYardRemoteConfig())
    except (KeyError, NotImplementedError, Exception):
        pass
What OTAUpdate does is too much code to copy+paste into this post, but should be general enough for most repos following the patterns in this post to just copy+paste. What I can share is how OTAUpdate is invoked in practice. In my microdot webserver, in my run function which invokes the server to start with, I add:
1
2
3
def run() -> None:
    app.run(host="0.0.0.0", port=80)
    ota_closure()
Where ota_closure is:
1
2
3
4
5
6
7
def ota_closure() -> None:
    if ServerMethods.update_flag:
        # Blink to the user letting them know the device is updating.
        pico_led.on()
        ota()
        pico_led.off()
        app_reset()
Where ServerMethods is some singleton that maintains the state of the server. To update ServerMethods.update_flag, I have the endpoint:
1
2
3
4
5
6
7
@app.get("/update")
@log_exception
@led_flash
async def server_app_update(request: Request):
    app_ota()
    request.app.shutdown()
    return StatusMessage._SUCCESS
Which does nothing but:
1
2
def app_ota() -> None:
    ServerMethods.update_flag = True
followed by shutting down the server to update. By the time the server is shutdown, code updates are downloaded and written to the file system and the Pico is restarted. When the Pico comes back to life, it will execute the updated code.
I have noticed that the timing of this approach sometimes fails, prompting two attempts to update. Likely, this approach can be optimized, but the general idea will be similar:
- request OTA
- shutdown server (so that incoming downloads are not blocked)
- OTA
- restart Pico
Summary
I covered alot of content in this post, hopefully part (or all) is useful to someone. In my own project, I can easily control multiple Pico’s, each having 13 devices, all asynchronously through an app. When developing new features, I have automations to help build and iterate quickly with a local Pico at my house. When I am ready to push new features out to my family’s devices, I can push code to GitHub (adding a new tag) and have them OTA update their devices.